
Peaceful Garden OSW Part Two ~ Weekly Wed. #68
Happy Wednesday. I am excited to share with you part two in our three part One Sheet Wonder series. Today I am using the second 4 x 12 strip to create three more cards. CLICK HERE if you missed part one where we made three cards using the first 4 x 12 strip of Peaceful Garden DSP.


Click the button below to download the free project sheet!
A Closer Look….


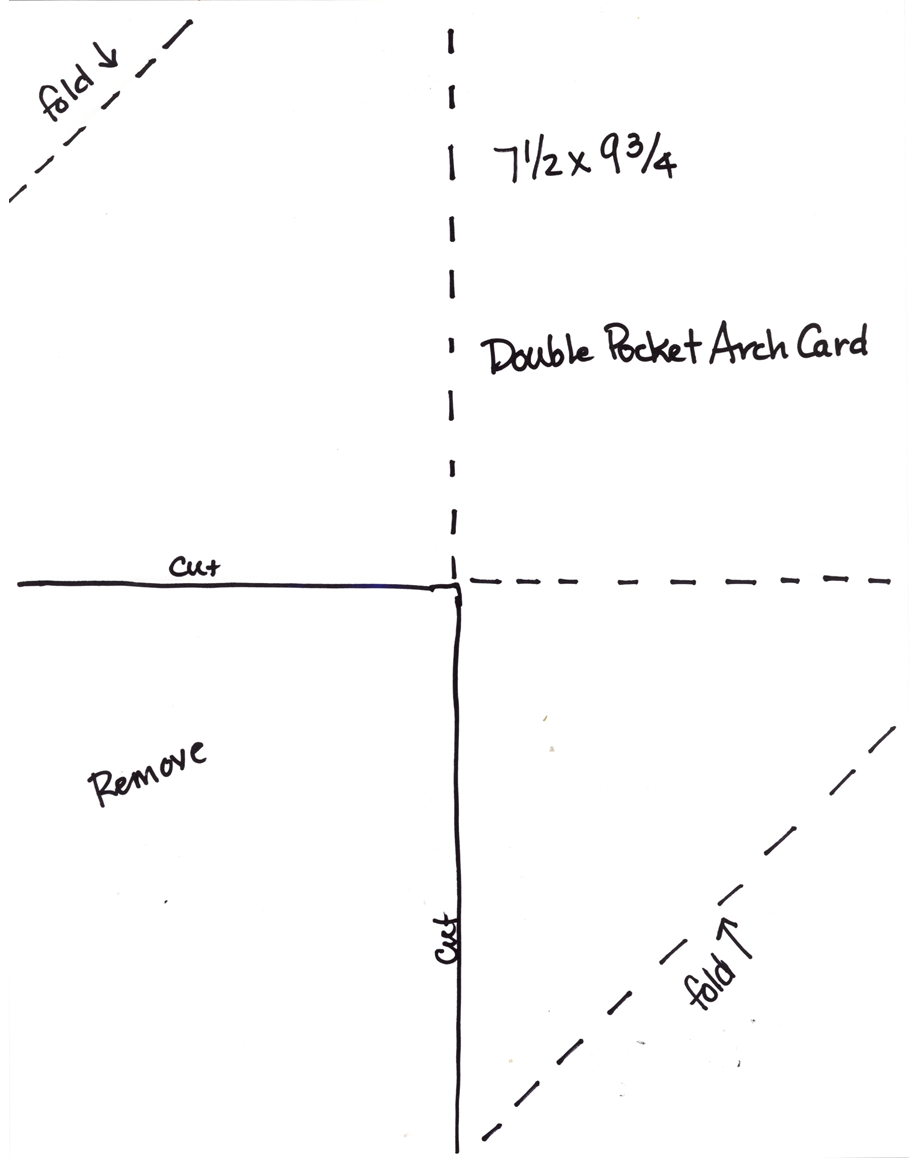
Thanks for joining me for part two. Join me on next Monday for part three! CLICK HERE to download the cutting template! Happy Stamping!
Thanks for stopping by!
Until next time, be blessed, Renae


Peaceful Garden OSW Part Two ~ Weekly Wed. #68 Read More »


